Bare Hands Blog
Tool Feature – Jointer
By Shane Thomas

If you are new to woodworking, you may look at a jointer and have no idea what it does. Don’t worry, you are not alone. Unlike say a chop saw, the jointer doesn’t exactly scream its purpose. This is because despite its large size, the utility of the jointer is in the small details.
Purpose
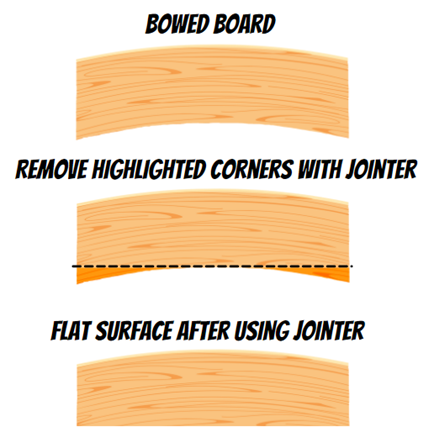
So, let’s get straight to it. The intent of a jointer is to make your piece of wood square and/or flat. If you have done many DIY projects, you know how important it is to have straight/flat boards. Any distortion in the wood will follow with an undesirable result in the end product. This could be a twist, bow, crook, or cup in your piece. Truing your rough-cut wood should be your first step, and the jointer is the tool to do the job. As they say, “start square, finish square”.

How it Works
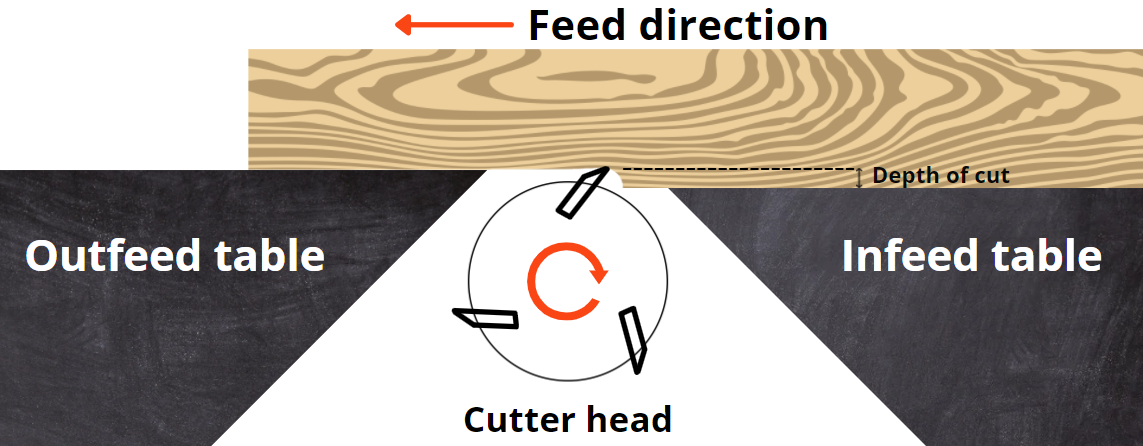
The Jointer has an infeed table and outfeed table that looks like two wings. Between the two, is a helical cutter head that rotates clockwise. This is where the small detail of the jointer comes in. The infeed table of the jointer is typically set 1/16 of an inch lower than the outfeed table and the height of the blades on the cutter head (see figure below). This allows you to pass a board through the jointer, shaving 1/16 off the bottom while keeping the cut portion of the board and the uncut portion of the board resting flat on both tables simultaneously.

Of course, when your board is distorted, not all surfaces of the board will touch the infeed/outfeed tables. Only the lowest parts of the board will touch, and only the lowest parts will be cut. A badly distorted board will require multiple passes on the jointer to become perfectly flat.
Once you have one flat side, you can use the back fence of the jointer to square up your board to the adjacent side. Keeping the flat side of your board against the fence as you pass it through the jointer will ensure you get a 90-degree corner.
Maker’s Bench
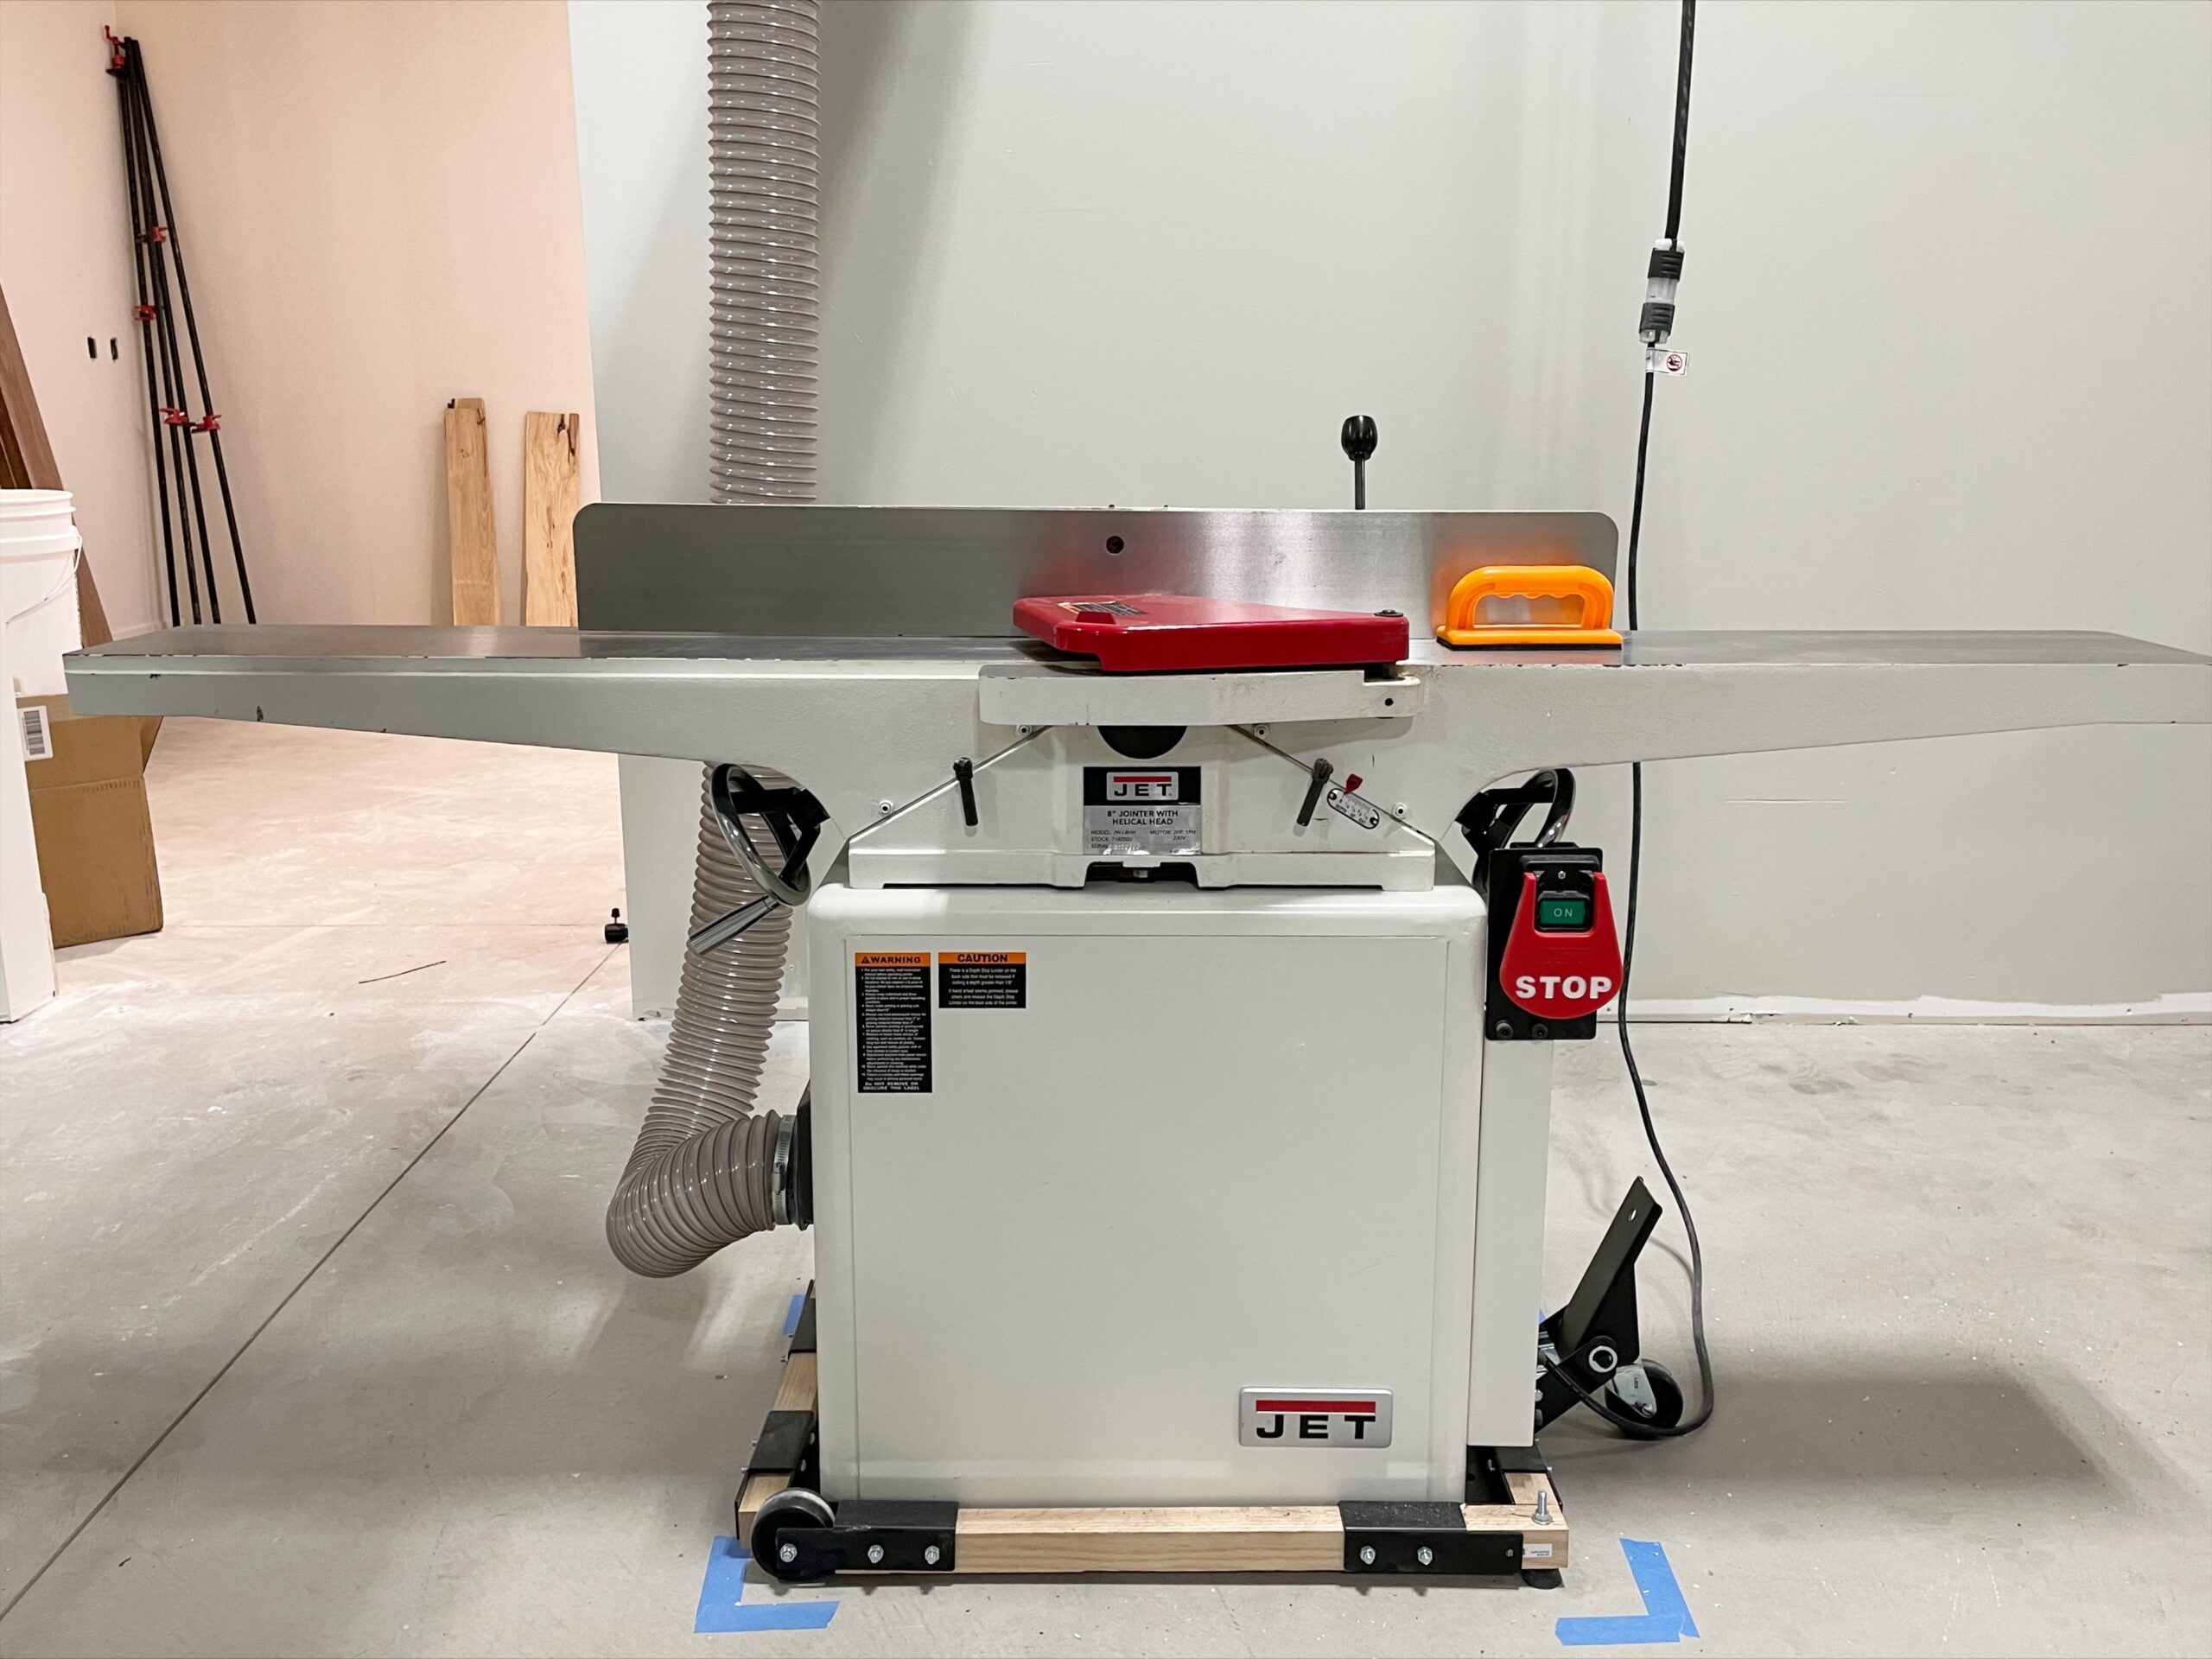
At Maker’s Bench we boast a JET JWJ-8HH 8″ long bed jointer. This is a top-of-the-line jointer that features a 2HP motor and easily handles any jointing task. Extra-long infeed/outfeed tables allow you to joint longer boards without any tipping.
Other Tips
- Safety – Use all safety guards that come with your jointer. This helps keep fingers, and other objects such as clothing away from the cutter head. Speaking of clothing, make sure to not wear loose fitting clothing or jewelry as the cutter head can catch those things and pull you in.
- Set up – Things to check; Make sure your infeed and outfeed tables are parallel to one another. Make sure your fence is at a 90-degree angle. Keep your tables clean and waxed to allow the board to move cleanly and easily across the jointer.
- Technique – You want to make sure you are primarily applying a horizontal force to your board. The only downward force should be to counteract the force of the cutter head pushing up, which is very little. Too much downward force will distort your board and not give you the results you want. A good jointer push stick can help with this.
- Cut with the grain –Grain should be going down from top of the board to the bottom going away from the cutter head. This will give you a cleaner cut.
- Concave side down – When jointing a bowed board, keep the concave side down, giving you two points of contact with the tables. This will help keep the board stable.
Address
5000 Goodman Drive,
Unit 101
Timnath, CO 80547
Hours
Drop-In Session Hours:
Tues, Thurs, Sat, & Sun: 1 p.m. - 4 p.m.
Wed & Fri: 9 a.m. - 12 p.m
Class schedule varies


